• Email
  • Facebook
  • Instagram
  • Pinterest
share our JOY

JOY{filled}family

striving to radiate Him always

  • Home
  • Blog
  • Brown Scapular
  • Liturgical Calendars & Planners
  • Wellness
    • Essential Oils
    • Fitness
    • Nutrition
  • Homeschool
  • Sacraments
    • Baptism
    • First Communion
    • Confirmation
  • Girls’ Groups
    • Rosa Mystica Girls’ Society
    • SS Little Flowers

Jesee Tree Ornament ~ Ruth

November 21, 2012 by Lena {JOYfilledfamily} Filed Under: Crafts, Jesse Tree 5 Comments

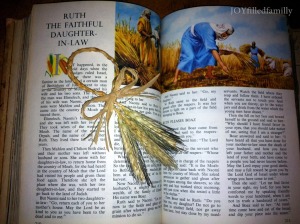
A symbol of God’s providence.

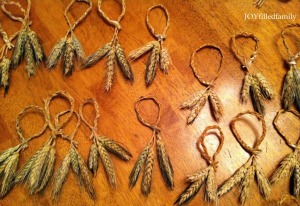
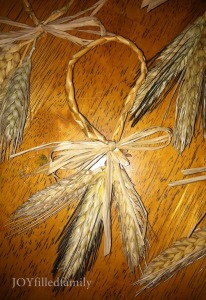
I created this ornament for the Jesse Tree Swap hosted by Jessica at Housewifespice.

IMG_5127

inspired from here

Ruth and Boaz (Symbol: sheaf of wheat)
Ruth 1:16; 2:2, 8, 10-12; 4:13-14 – RSV

But Ruth said [to Naomi], “Entreat me not to leave you or to return
from following you; for where you go I will go, and where you
lodge I will lodge; your people shall be my people, and your God
my God.”

And Ruth the Moabitess said to Naomi, “Let me go to the field,
and glean among the ears of grain after him in whose sight I shall
find favor.” And she said to her, “Go, my daughter.” … Then Boaz
said to Ruth, “Now, listen, my daughter, do not go to glean in
another field or leave this one, but keep close to my maidens.”

Then she fell on her face, bowing to the ground, and said to him,
“Why have I found favor in your eyes, that you should take notice
of me, when I am a foreigner?” But Boaz answered her, “All that
you have done for your mother-in-law since the death of your
husband has been fully told me, and how you left your father and
mother and your native land and came to a people that you did
not know before. The Lord recompense you for what you have
done, and a full reward be given you by the Lord, the God of
Israel, under whose wings you have come to take refuge!”

So Boaz took Ruth and she became his wife … and the Lord gave
her conception, and she bore a son. Then the women said to
Naomi, “Blessed be the Lord, who has not left you this day without
next of kin; and may his name be renowned in Israel!”

~~~

IMG_5116

IMG_5110

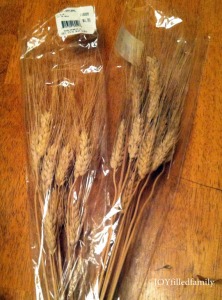
Supplies:

  • Dried Wheat (JoAnn – $4.99/15)
  • Scissors
  • Hot Glue gun
  • Raffia

Directions:IMG_5129

  • Soak the wheat stems in water (do not get the wheat head wet)
  • Remove the stems from the water, pat dry
  • Collect three like-sized wheat stalks to braid
  • Wrap the end of the braid to meet the start of the braid
  • Glue the braided stem into place (I also used a clear rubber band to secure the stem)
  • Trim and embellish as desired

~~~

Additional Meditation for this Reflection

found at Presentation Ministries

“Wherever you go I will go, wherever you lodge I will lodge, your people shall be my people, and your God my God.” —Ruth 1:16

Ruth the Moabite committed social suicide when she insisted on returning with her mother-in-law to Jerusalem after both of their husbands died. Being a foreigner, there was little chance for Ruth to be married and have a livelihood.

Prayer: Father, make me faithful in serving my brothers and sisters in Christ no matter how difficult the circumstances.

~~~

“May the Lord reward what you have done! May you receive a full reward from the Lord, the God of Israel, under Whose wings you have come for refuge.” —Ruth 2:12

The Lord rewarded Ruth’s faithfulness by giving her protection and provision in leading her to glean in the fields of Boaz.

Prayer: Father, by my faithfulness to You, may I give You an opportunity to reward me.

~~~

“The neighbor women gave him his name, at the news that a grandson had been born to Naomi. They called him Obed. He was the father of Jesse, the father of David.” —Ruth 4:17

Ruth not only married Boaz; she also became the great-grandmother of David, from whose house came Jesus, the Messiah and Son of God. True victory, success, prosperity, and happiness are not attained by worldly means but by faithfulness to God and His people.

Prayer: Father, may I lose my life so I can gain it (Lk 9:24).

~~~

Be like Ruth. Stay with your Redeemer. Abandon your life into the hands of Jesus.
Felt Name Tags

November 5, 2012 by Lena {JOYfilledfamily} Filed Under: Crafts, Embroidery, RMGS 2012-13

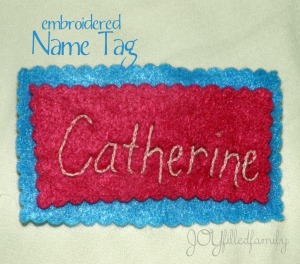
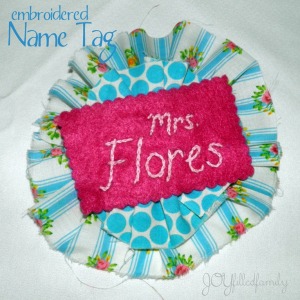
name tag

The felt name tag is a simple embroidery project that I used for my RMGS girls.  I ended up using felt that I had stashed away in the craft room.  I believe it was felt that Rose used for her Christmas gifts from two years ago – felt posies. 
The members of Rosa Mystica Girls’ Society will use the name tags for meetings, social events, and service projects.

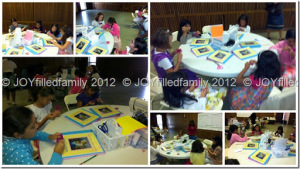
9.1.12 girls working on their embroidered name tags

~~~

FELT NAME TAG

Supplies:

  • felt
  • safety pins
  • embroidery floss
  • embroidery needle
  • scissors (pinking shears)
  • hot glue gun
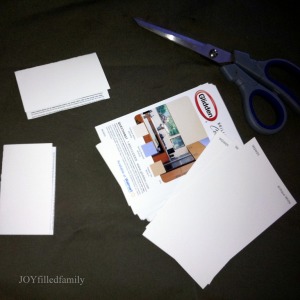
  • paint chip cards or cardstock or recycled plastic credit card/gift card


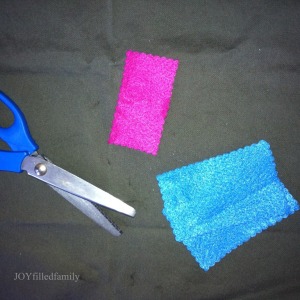
Steps:name tag felt pieces

  1. cut felt to desired shape and size (felt 1)
    • trim out with pinking shears
  2. write name on felt with sharpie
  3. embroider name onto felt with a split stitch
    • more threads in the floss will yield a bolder name
  4. cut another piece of felt (felt 2), slightly bigger than the felt with the embroidered name (felt 1)
    • trim out with pinking shears
  5. (optional) stich the embroidered Felt 1 to the backing – Felt 2, using a running stitch around the parameter
  6. double up the paint chip or cardstock by gluing two pieces together
    • trim the glued pieces to a size slightly smaller than the largest piece of felt (felt 2)

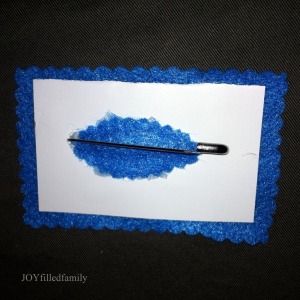
name tag backname tag backing 

     7.   hot glue Felt 2 to the cardstock backing

     8.  (to be done if step 5 was not completed) hot glue Felt 1 to Felt 2 name tag back with pin

     9.  adhere a safety pin to the pack of the assembled felt pieces, using hot glue

     10.  embellish as desired

embroidered name tag - leader

~~~

Embroidery Links

  • Pocket Stitch Book – Additional Embroidery Techniques
  • Turning a Child’s Art into Embroidery
  • St. Doll Embroidery
  • Split stitch
  • Stem stitch
  • Chain stitch
  • Back stitch
  • Running stitch
  • How to tie a knot
  • How to mend with patches

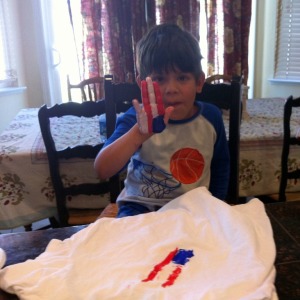
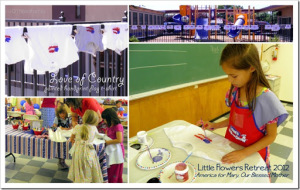
Love of Country Handprint Flag T-Shirt

June 26, 2012 by Lena {JOYfilledfamily} Filed Under: 07 July, Crafts, July 4th, Our Lady of Guadalupe, Patriotic

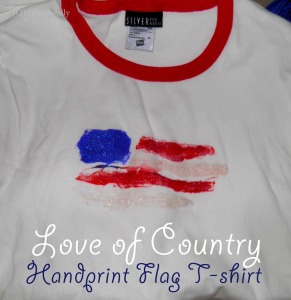
Love of Country Shirt

This shirt was another craft made in honor of Our Lady of Guadalupe, Patroness of the Americas.  Twenty-three little girls made this craft at my last Little Flowers Retreat.

craft inspiration

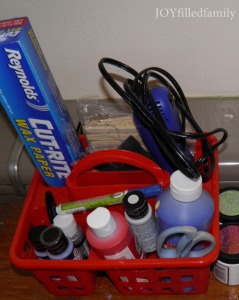
Love of Country Shirt supplies

Supplies:

  • red acrylic paint – $1-$3
  • blue acrylic paint – $1-$3
  • white metallic acrylic paint – $3
  • red glitter paint – $5
  • blue glitter paint – $3
  • white or silver glitter paint – $5
  • paint brushes (small foam brush used to paint hand and reg. brushes used for glitter) – $2/pack of 10
  • t-shirt – $1 at the dollar store
  • wax paper – $2.50

P6200322

Instructions:

  1. place wax paper inside t-shirt
  2. paint flag on hand with a generous amount of paint
    • right hand – thumb will not be painted
    • left hand – thumb will be the the bottom stripe of the flag
  3. reapply a coat of paint on hand to ensure that the paint as not dried
  4. apply painted hand to t-shirt at the desiredIMG_3568 location.  be certain that the blue area of the flag will be imprinted on the top left.  keep the fingers together and do not roll the hand—press straight down on the hand to ensure a complete imprint.  remove the hand straight up to avoid any smears.
  5. paint colored glitter paint over the corresponding color on the t-shirt
  6. let dry completely
  7. heat set painted flag with an iron.  place a lightweight pressing clothe over the flag.  set iron to the highest setting for your fabric.  press the iron over the painted area firmly for about 30 sec.  keep the iron moving over the pressing cloth to avoid scorching or burning of the shirt. 
  8. let cool
  9. remove wax paper
  10. wash and wear

Love of Country handprint shirt

Our Lady of Guadalupe ~ ora pro nobis

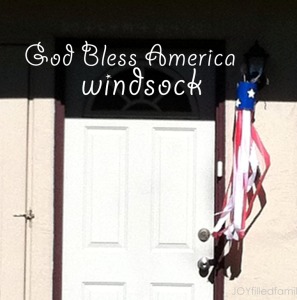
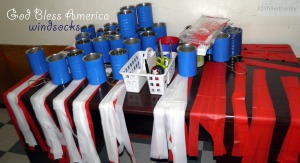
God Bless America Windsock

June 26, 2012 by Lena {JOYfilledfamily} Filed Under: 07 July, Crafts, July 4th, Our Lady of Guadalupe, Patriotic

God Bless America

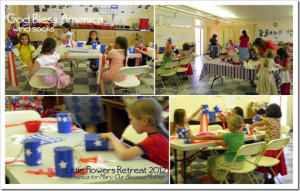
This windsock was a craft made in honor of Our Lady of Guadalupe, Patroness of the Americas.  Twenty-three little girls made this craft at my last Little Flowers Retreat.

craft inspiration

P6190212

Supplies:

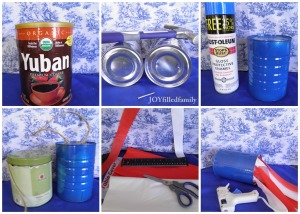
  • tin can (coffee can) – recycled
  • blue spray paint – $3
  • white contact paper (a roll can be found in the kitchen dept. of the store) – $5
  • white plastic table cloth (you can get enough strips out of ea. table cloth to make 16 windsocks) – $1
  • red plastic table cloth – $1
  • nail and hammer
  • twine
  • star craft cutter (purchased at JoAnns with a 50% off coupon and teacher’s discount) – $6
  • scissors
  • ruler
  • hot glue gun or permanent adhesive tape (1 role of tape covered 16 cans)  –  $3.50

Girls Retreat 6.20

Instructions:

  1. wash the inside of the tin can
  2. strip the wrapping off the coffee can
  3. punch two hole in the top of the coffee can with a nail and hammer
  4. spray paint the coffee can blue
  5. cut 4 strips* of white table cloth.  keep the table cloth folded as it was in the package when cutting.  use a standard ruler as your guide for the width.  keep the cut strips folded once at the top.  the strip should be 26 in long and about 1.25 in. wide.  this long length looks nice blowing in the wind but also comes in handy if the children assemble their windsocks unevenly and a trimming is in order.
  6. cut 4 strips of red table cloth.  (follow the above details)
  7. punch stars on the contact paper.  be certain to rest the punch on a hard surface so that you get a clean cut star.
  8. tie twine through the holes on the top of the can
  9. adhere stars as desired
  10. run the adhesive bond tape along the inside bottom of the can.
  11. adhere the strips of white and red table cloth along the adhesive, alternating colors.  be sure to put the folded part of the strip on the adhesive.  this will allow the strips to open in the wind and give a fuller look to your windsock. 
  12. hang your windsock

*4 strips of ea. colored worked for my small coffee can.  your number may vary.

God Bless America Wind socks

Our Lady of Guadalupe ~ ora pro nobis

~~~

Stash Bash

I’ve never met a crafter without a stash of some kind. This year my goal is to use up all the craft supplies I have spent money on that are taking up mental and physical space in my life.   

Empty Tomb ~ Easter Garden

March 14, 2012 by Lena {JOYfilledfamily} Filed Under: Crafts, Easter, Lent 11 Comments

Almighty and ever living God, whose Son Jesus appeared to Mary Magdalene in a garden and called her to be the first witness of his Resurrection:  we beseech thee to bless this humble garden wherein we have a remembrance of the mighty acts by which we have been saved; grant that all those who see it may ponder and adore the glory of the Cross and the mystery of his Resurrection and may sing with joy the victory hymn; through Jesus Christ our risen Lord, who liveth and reigneth with thee and the Holy Spirit, one God, for ever and ever. Amen ~Station at an Easter Garden

~~~

IMG_1189

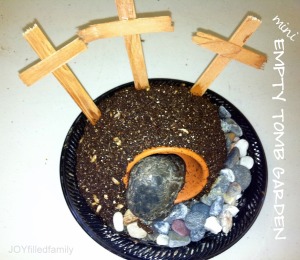
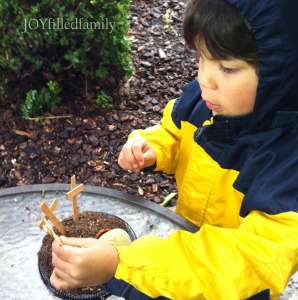
This a wonderful Lenten/Easter project for the entire family.  All ages will enjoy it.  I recently used this as a craft for my Little Flowers’ study on the virtue of fortitude.

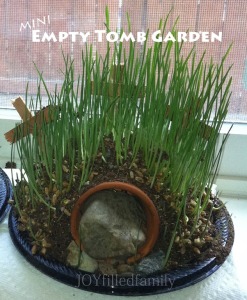
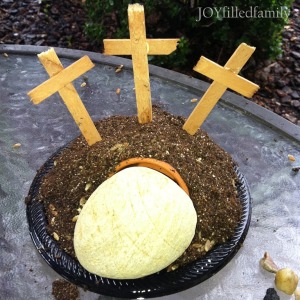
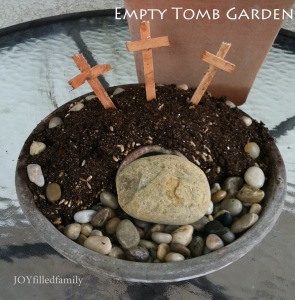
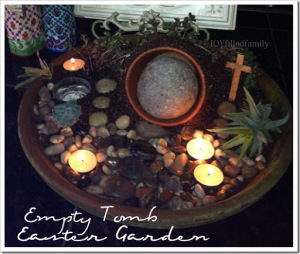
The Empty Tomb Garden provides a visual reminder of what we are preparing for during Lent, Christ’s Resurrection.

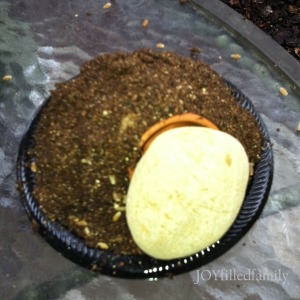
An Easter garden has three essential features:  a mound with at least one cross to represent Calvary; a stone or stone structure to suggest the empty tomb; and lots of live greenery/flowers.

The children will have an opportunity to tend and nurture their gardens during Lent and beyond.  They can meditate on Christ’s passion and offer an ejaculation while tending to their garden.

We adore Thee, O Christ, and we bless Thee.
Because by Thy holy Cross, Thou hast redeemed the world.

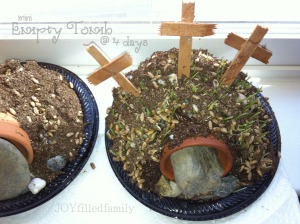
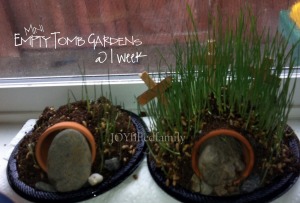
The grass will grow within days.  It is wheat grass and can be eaten.  It symbolizes new life.

The children will remove the stone on Easter morning and rejoice.

~~~

I found my inspiration throughout the internet and Pinterest.  House of Joyful Noise provided a great tutorial.

~~~

IMG_1214

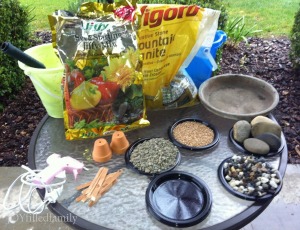
Supplies:

Garden

  • Seed Starting Jiffy Mix ($3.80/bag – 1 bag made 14 mini gardeIMG_1052ns)
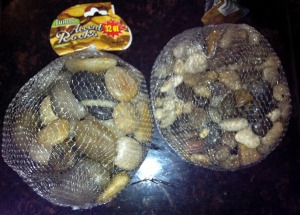
  • Decorative rocks ($5.59/large bag of Mountain Granite from HomeDepot – 80+mini gardens.  $1/small bag of decorative rocks from the Dollar Store – 2-3 mini gardens)
  • Gravel (this is used as a bottom layer, not much is needed.  I took my rock from my home gardenIMG_1048)
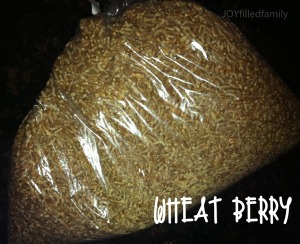
  • Wheat Berry ($.77/lb – 2lbs – 40 mini gardens.  I found my wheat berries at Winco in the bulk bin foods.)
  • Dessert Plastic Plates or shallow pots ($9.89/100 plates.  I used plastic plates because they were the most economical choice for a large group.  I found my plates at Smart-n-Final)
  • Mini Terracotta Pots ($.24/ea at WalMart)

Crosses

  • Popsicle sticks ($1/150 sticks at the Dollar Store)
  • Brown Paint
  • Hot Glue Gun

Misc.

  • Water
  • Bucket
  • Spray Bottle
  • Hand Shovel

IMG_1107

Directions:

Garden

mix the seed starter with water

IMG_1217

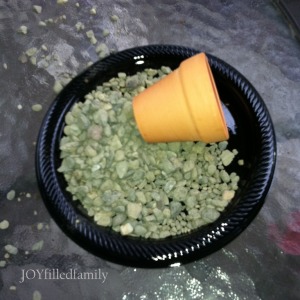
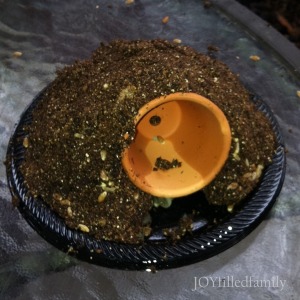
position tomb/terracotta pot in desired location on plate/pot

lay down the gravel on the plate, securing the pot into place.slightly build up the gravel for your hill.

IMG_1220

top the gravel with soil

IMG_1221

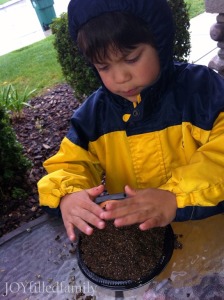
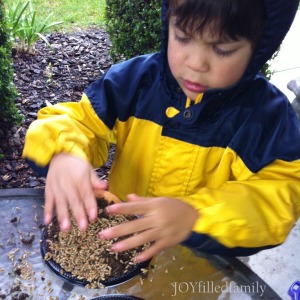
cover the entire soil with the wheat berries.  press the wheat berries into the soil.

IMG_1225

add a layer of soil on top of the wheat berries.  press down firmly.  (this step is optional.  it will slow the growth of the wheat grass.)

clean the plate.  remove the wheat berries from areas that you do not want grass to grow.

IMG_1227

create a path from the tomb with decorative rocks.  this represents how the disciples ran to the tomb on Easter morning.

add decorative rocks as desired

IMG_1230

insert the crosses

papi

IMG_11601 week

The grass grows faster with less top soil.  The garden in the left of both pictures had a thick top soil packed tightly over the wheat berries.

Crosses

Paint the popsicle sticks your desired shade of brown or create crosses from sticks and twine.

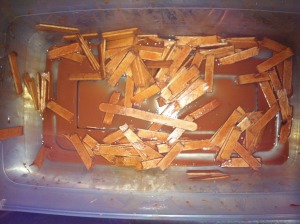
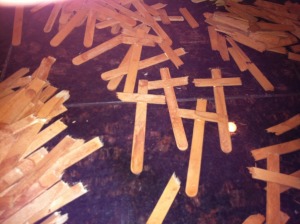
I chose popsicle sticks since I had to make over 100 crosses. I did not hand paint each stick.  Instead, I created a paint wash.  IMG_1041

add water to brown paint in a plastic pin.

run popsicle sticks through the paint wash.

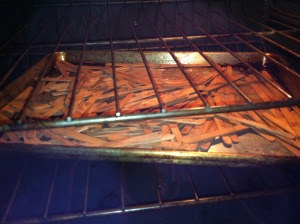
IMG_1044bake at 350 for 5-8 min for a quick set of paint

IMG_1046

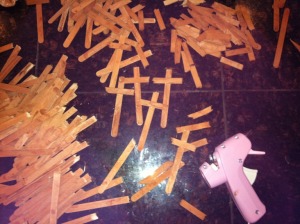
break off the tips of the popsicle sticks for the small cross section.  break the stick in thirds.

break off the tip of the popsicle stick for the vertical piece.  the round part will go into the soil

IMG_1047

hot glue the cross together

~~~

We made larger Easter Gardens for the home.

IMG_1301

inspired by Ann @ A Holy Experience

IMG_1275

This garden sits on our front porch.  It will serve as a reminder to all who enter that we are preparing for Christ’s resurrection.

~~~

Empty Tomb/Easter Gardens:

  • Easter Garden I – Catholic Culture
  • Easter Garden II – Catholic Culture
  • Calvary Hill Planting
  • Make an Easter Garden: A Visual Parable
  • Celebrating the Empty Tomb
  • Making an Easter Garden
  • Our Easter Garden
  • Creating an Easter Garden

Lenten Link Up ~ Catholic Icing

  • « Previous Page
  • 1
  • 2
  • 3
  • 4
  • …
  • 11
  • Next Page »

Hi! I'm Lena, mama of JOYfilledfamily.
We are a traditional Catholic family striving to live for Jesus Christ in everything we do. We pray to completely surrender our will to His and to become His servants. Our mission of this blog is to share our JOY.

This blog serves as a journal of us making good memories, living the liturgical year, and our spiritual journey.

Subscribe to our Newsletter

  • Home
  • About
  • Blog

Copyright © 2025 swank WordPress Theme <a PDCD